Reducing Video File Size for E-Learning Media
Waiting for content to load and buffer is at the very least, a great disappointment. At least, it wastes precious time that employees could spend on work, together with wasting other resources like storage and bandwidth. So, if you are planning to use the video in your eLearning couches then it is better to consider a big image. There are a few problems for anyone creating video content for eLearning consumption. Videos are generally large files that’s why they slow the upload and download times. Nevertheless, there are a few easy tactics that you can use to decrease the video file size. Keep reading to know about the How and Why of compress video files for eLearning.
Why Compress the file size of a video for eLearning?
Managing and storing large video files for eLearning becomes difficult too quickly. Taking up more space, Taking longer to download, and Taking longer to upload are the main reasons why we compress the video for eLearning. And you can easily reduce the video size by using compression techniques.
According to the rule of thumb, one hour of uncompressed1080i video at 60 frames per second use about 400GB and it’s a lot of space. While a compressed video file with the exact specifications will be around 200 MB in size. Below are the points that will tell you why compressing the file is important:
- Large files are more problematic to store. Large external hard drives are the only solution to this problem. But actually, they only help you to address the symptom rather than giving you a complete cure.
- They will take a lot of time to load and play the video for viewers. 4K videos are great for every network.
- Large video files take a long time to upload the video and create your course. But a compressed video will quickly upload and the time to compress a video is greatly faster than uploading the original file.
How to compress a video for eLearning?
As with all kinds of compress video files software, there is a relationship between the quality of the video and the file. The main point is to balance these two to confirm that you are not sacrificing extreme quality. There are multiple tools available that can easily and speedily compress your video. Follow the given steps to compress a video easily:
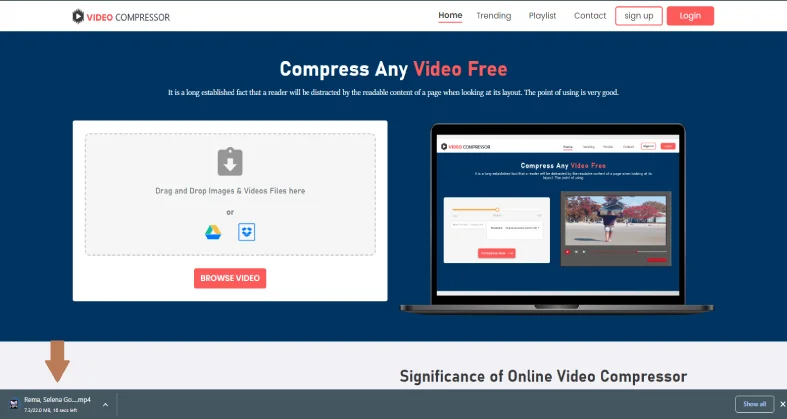
- Search video-compressor online
First, open your browser and go to any online video compressor (video-compressor.io)
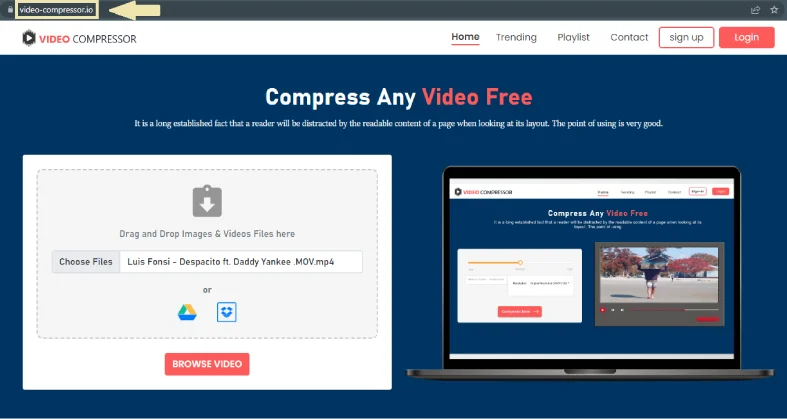
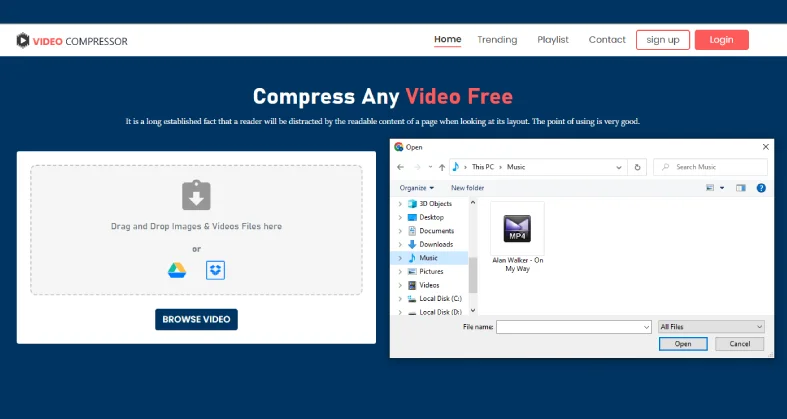
- Select Your video
Now upload the video that you want to compress
- Select your Formate
Select a format, you can also select a preset from the drop-down. We recommend you select MP4. Then choose a video encoder such as H.264.
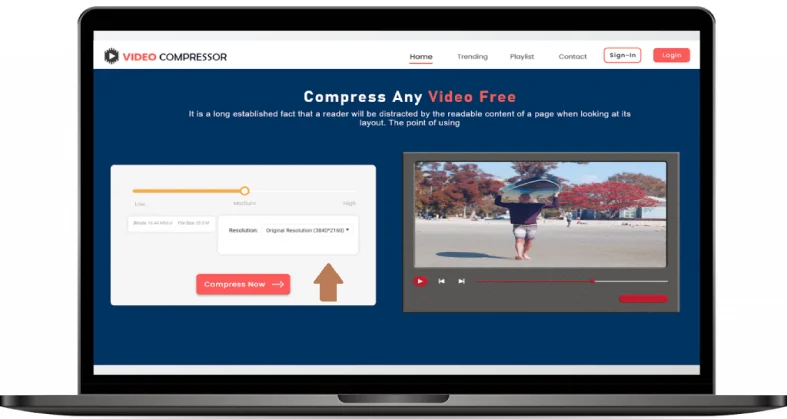
- Finally, click start
Click on the Compress button to download your compressed video
Finally, click start
The Pros and Cons of Compressing Videos For
There are some pros and cons of compressing videos for eLearning that we are going to discuss. One of the most basic pros of compressing video is that it occupies less space. Compressing files will allow us to store more video files in the space. And, you’ll not require another hard drive. Compressed video files have fewer bits than uncompressed files and use fewer Mbps when you download them.
Everything in this world has advantages as well as disadvantages. So video compressing tools also have some disadvantages that we are going to discuss. The main cons of using such software are that complication has to be again, and it is very tough for a user. And sometimes, you will face many errors while compressing the video files.
You May Also like:
How To Compress Videos For Your Online Course
How To Resize Video For Instagram For Free


Video-Compressor.io Vs Free Convert Video Compressor
Veed Video Compressor Vs Video-Compressor.io
3 Easy Ways to compress video without losing quality